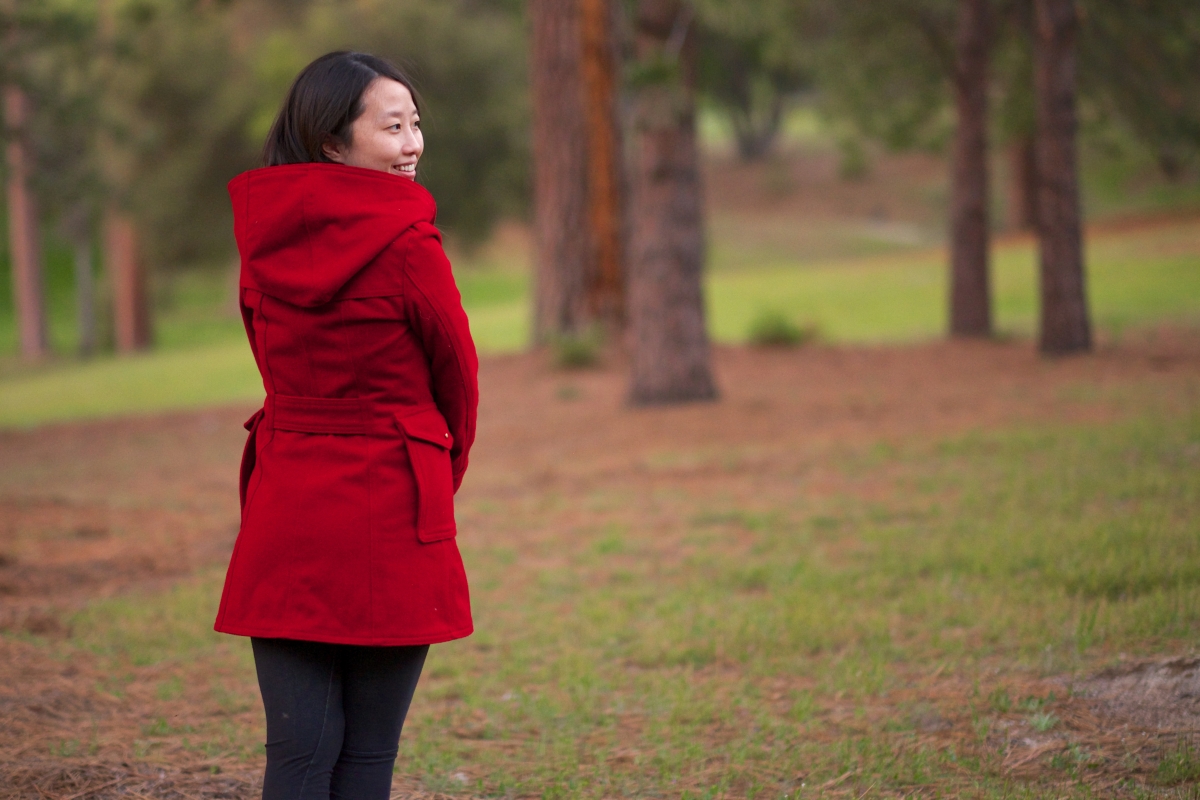
Hi all! Its been a while since I posted any proper sewing project, in fact, its been 4 months! There has been few projects in between, and I just havent had the opportunity to get photos taken. First thing to show you – a red coat!!! I know, winter is finally over for the northern continents, I’ve actually finished this coat early January, and wore it throughout the winter. I had the chance to take it out for a spin again just a few weeks ago when temperature dipped.


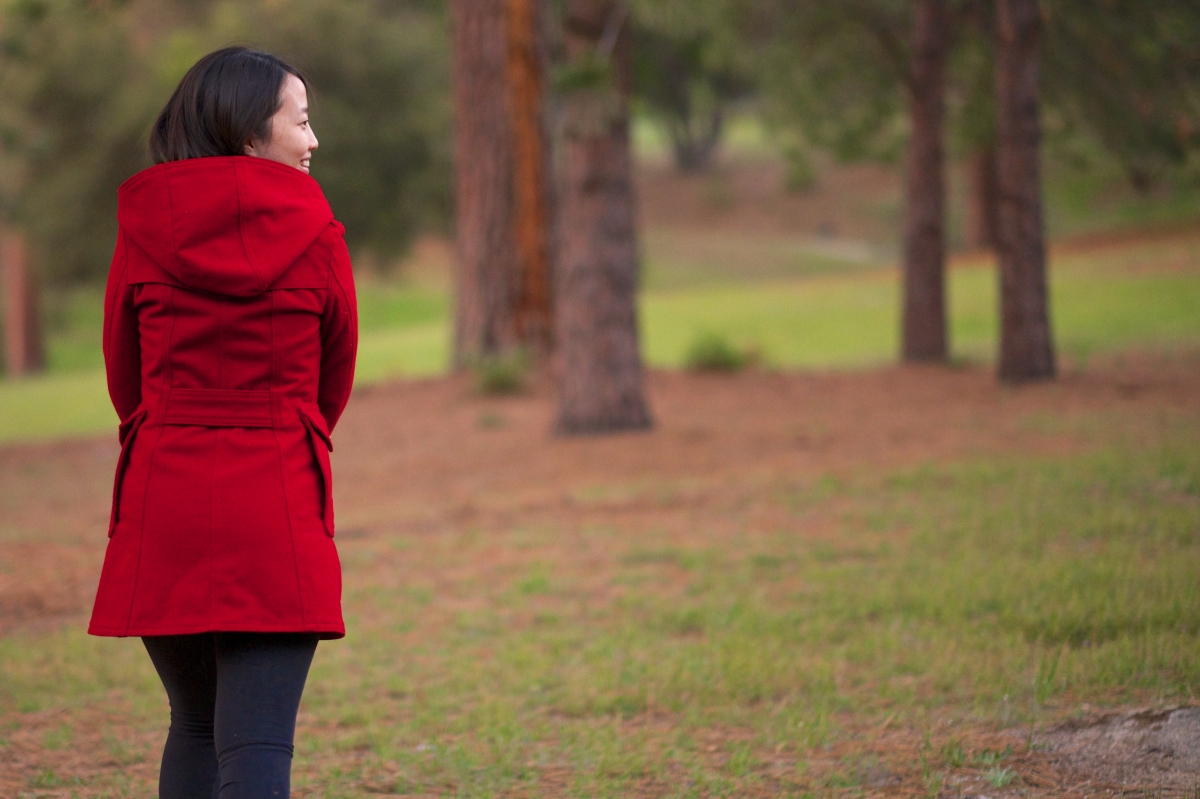
I’ve been wanting to make a red coat for a while. I have a red coat that I got from AE a while ago because it was cheap. My husband really likes the look of me in red, but I hated that coat because 1) the sleeves are way too long 2) material is scratchy 3) its a super thick coat but short as well, so i always end up with a toasty upper body but a freezing butt 4) it doesnt have a hood. So its time to take matter into my own hands!
I used my trust Talea pattern again (of course, it is now a tradition for me to make one per year). I made the coat slightly flared this time. I forgot to take photos of the inside, but its got a red lining – I decided to go with no funky lining this time! It also has a nice all red embroidered “Juebejue” Tag.
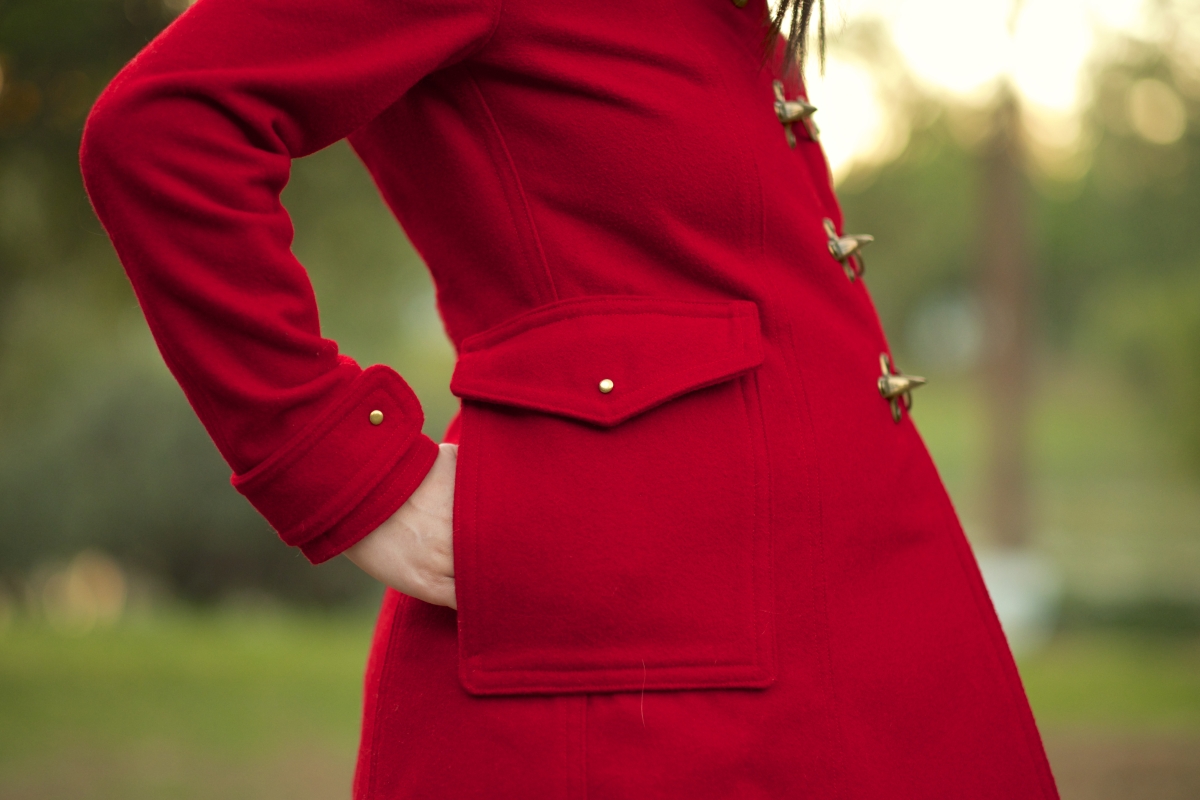
The pockets took me quite a while – both coming up with the pattern, finding the perfect placement, and actually sewing them in the right sequence of things. I like it quite a lot, you can put things into the pocket from the top, but you can also warm up your hands by sticking your hands in from the side. I think its a pretty typical pocket design for a lot of RTW coats I have but never did one myself. The placement of the pocket is actually copied from this fashion post I saw, I loved how the placement gives a little attention to the hips, giving the coat a really subtle peplum effect. Given that the original coat costs around 1k, I am quite proud 🙂
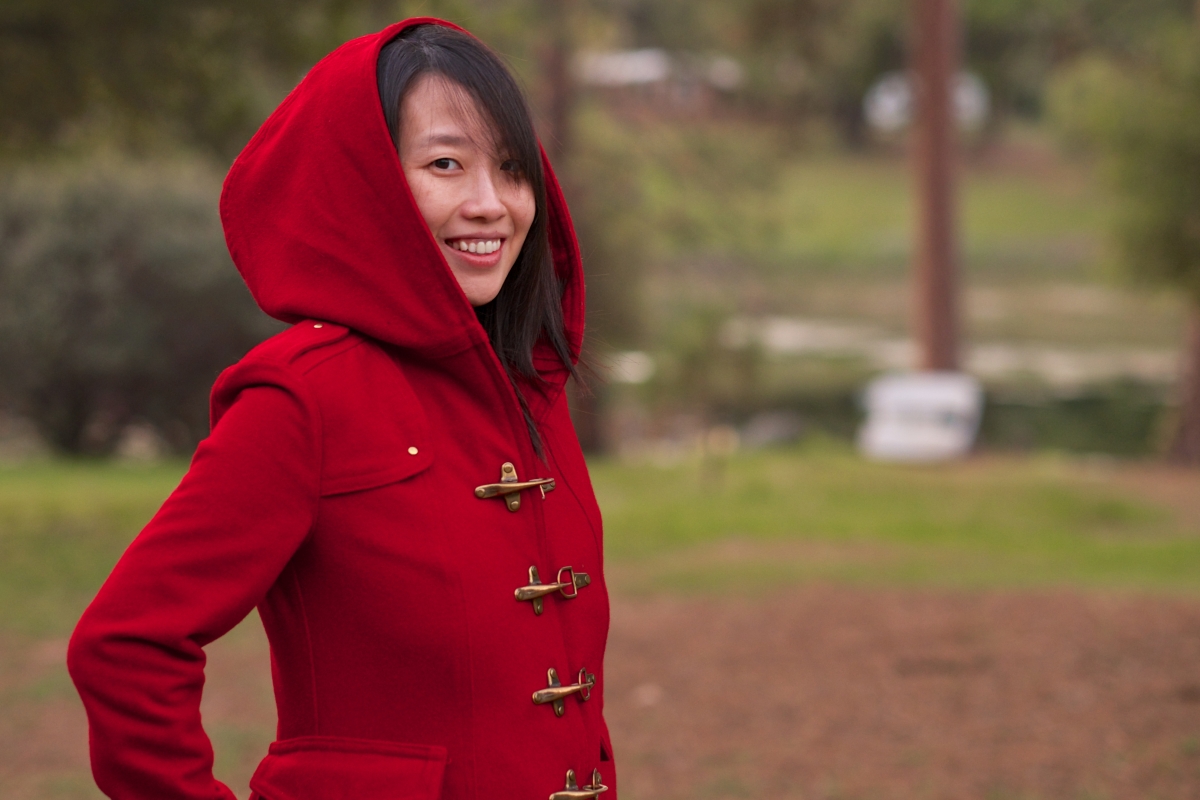
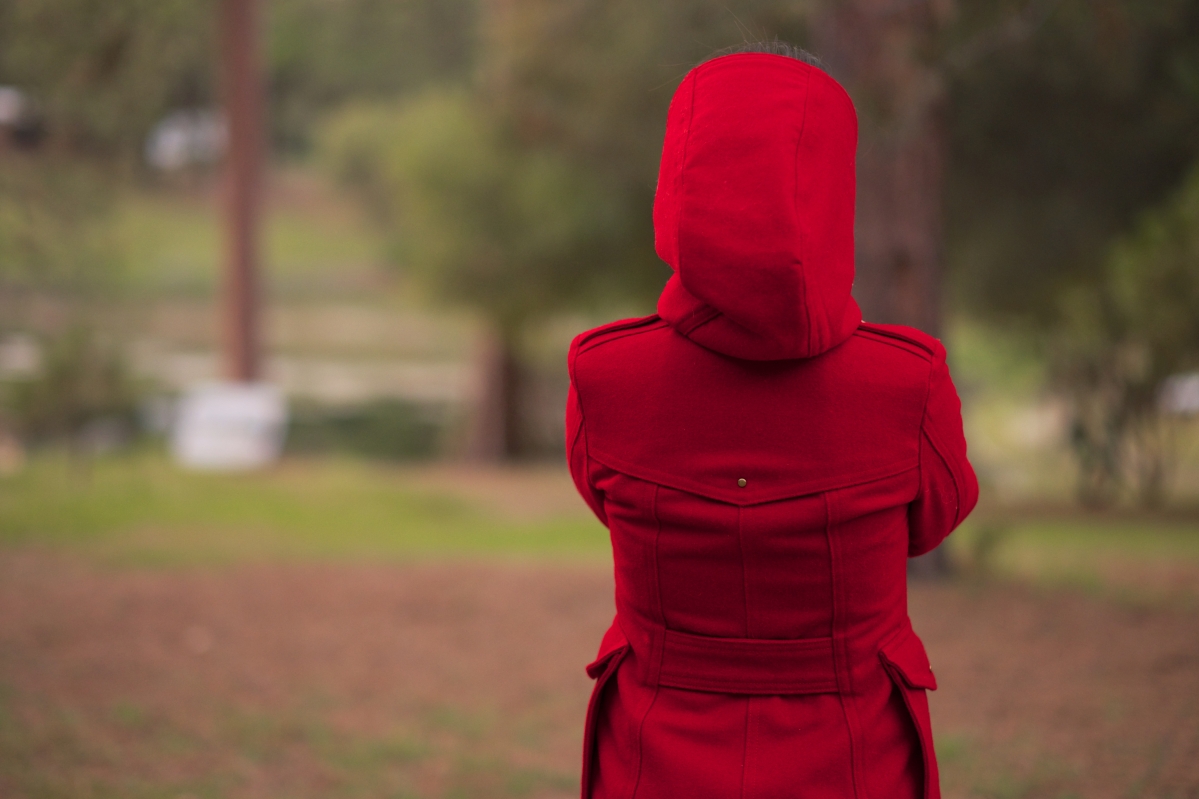
I wanted to do a proper collar with a hoodie that can be unzipped, but I was so short on fabric that I had to use red lining for inside of the hood and back flap. So that ambitious plan was scraped. I also made flaps for the back as well as the right shoulder. I really love trench coat details such as this. My husband found it amusing that I had a right shoulder flap (which was originally meant for padding your shoulder against a rifle butt), but put a metal decoration right there, totally defeating the original purpose of making recoil of rifles against shoulders more tolerable.
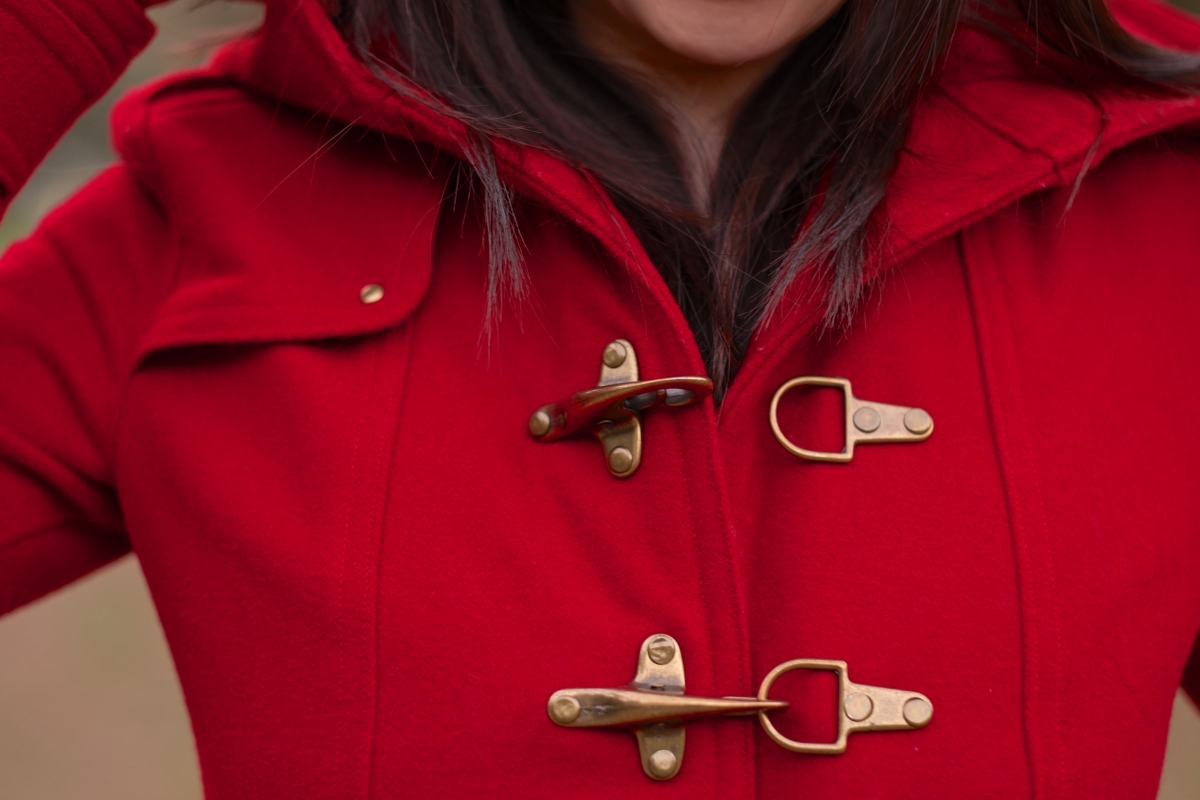
The coat itself was actually designed around the closure! I saw these fireman closures on a pretty ugly coat in goodwill, and had been dreaming of a coat made with the same closure ever since. Luckily I found some on ebay, and also bought rivets on ebay that has the same shade for accents throughout as well as to fix the closure onto the coat. I just love those buttons!!!
Lastly… you may think that this coat doesnt fit too well from the photos. well, I assure you that the fit is pretty great. I am just have an extra little one hiding in my belly, thats all! It is also why I’ve been absent for so long – no one ever warned me that the second pregnancy could be so much harder than the first!!


Congratulations! Yes, every pregnancy is unique, just as are the resulting little bundles of happiness. Love the coat!
thank you 🙂 its amazing how different the pregnancies can be!
Well congratulations – on the coat as well as on the pregnancy. Hope you are feeling better already and everything goes well!
thank you! I am out of the 1st trimester aka the worst 3 month of my life (i’ve had a good life 😛 ), all better now!
Your coat is lovely and congratulations with the pregnancy!
thank you! 🙂
I didn’t think one minute that your coat wasn’t fitting because your sewing is great! wish you well…
heehe thank you, glad to hear that!
wow that coat is gorgeous, love the red on you. Yes I thought in one of the photo that you had a bit of news, congrats.
i thought you may be able to spot the tightness in fitting 😉 you have such a knack for tailoring and fitting!
Gorgeous coat, and I kind of thought it looked like you might be expecting. 😉 So CONGRATULATIONS!!! 😀 And yes, my second was harder (in a different way) than my first, but even more tricky is sleeping–it’s hard to “sleep when the baby sleeps” if you’ve got an older child demanding your attention (and my oldest is in school even!!)
aww! sounds like i got some more rough nights coming. my first one isnt really sleeping through the night yet too!
This is adorable! I love red on you too, and those buckles are probably the coolest I’ve seen. Congratulations on your second little one!
Somehow I never connected the dots to figure out you’re up in the Bay Area too!
heeheehee, i wonder if those would look cool in steampunk costumes! and yes, i am in bay area! I kind of figured that you are up in north bay most of the time, I am in the south bay. I need to get up north for some of those SF sewing meet ups some day!
Funny how South Bay and North Bay can seem so far away…I swear I visit SoCal more often than South Bay! I would love to meet up with you sometime though if we ever get our acts together!
definitely!! 🙂 I’ll pin you whenever i may be up north (Berkeley has some good fabric stores!) and you should pin me if you happen to be down south as well!
how STUNNING you look in that red coat, and congratulations!!
aww thank you! 🙂 I suppose this is as bright as i’ve ever gotten near oonaballoona’s closet!
What a fabulous coat! Red is such a great color on you and congratulations!!
Thank you! 🙂
That’s a combination of all of my favorites- red, coats and you! =) you look amazing as always!
heehehehe! so true so true!!! would be EVEN better if its maroon, no?
That coat is my absolute favorite of all the coats you’ve made!!! It is so pretty on you, and I love the closures. The cute baby bump totally enhances the look.
hehehehe thank you!!! maybe one day it will cycle out of my closet and be passed to you! 😉 (though i think that day will come very slowly as this may be my favorite as well!)
Great coat! Thanks for the link to the store selling metal clasps. I love those. Where did you buy your rivets?
ebay also!! 🙂 I bought these in particular, but cant remember the size I picked. The color is bronze:
http://www.ebay.com/itm/25-50-100-set-Double-Round-Cap-Rivet-Stud-Leather-6mm-8mm-10mm-12mm-15mm-Mixed-/140876436785?pt=LH_DefaultDomain_0&var=440086633104&hash=item20cce3d531
Hi! Was just wondering how you designed the hoodie?
And did you use the burda adapting pattern for the back yoke?
Your coat inspired me to make one myself 🙂
thats great!! I hope you do share the photos here (link?) if you take a picture!
For the hoodie, I had traced the pattern off a RTW hoodie that I own and liked the shape of. I suggest look into your closet for a shape you like too. ITs got 3 pieces, 2 side one and one center rectangle.
I didnt use the burda adapting pattern for yoke – because I was too lazy to print one out. So I just drafted it myself after I finished making the back of the coat.
I’ll post the link when done 😉
Just need to wait for the wind and waterproof fabric I’m putting between the wool and the lining 😉